A Guide to Growing Watermelon in Containers Vertically: Harvesting Joy
Growing watermelon in containers vertically is an excellent way for saving space while still getting to enjoy the delicious, juicy fruit. It’s not too challenging to grow watermelons even in your garden! Give it some space to spread out, and it will generally require no maintenance even though it has a long growing season and does best in warmer climates.
Since watermelons need a lot of nutrients to grow, they are referred to as heavy feeders. The best soil for producing watermelons is loamy, with a little sandy texture that drains well and allows for proper drainage while still retaining an adequate amount of moisture. Clay soils with poor drainage can be problematic and cause root rot and other issues because clay soil tends to have too much moisture.
It might be challenging to find space to grow everything you want, especially when vine crops take up a lot of space if you don’t have a sizable vegetable garden. Whatever fruits and vegetables you can’t fit in an in-ground or raised bed garden can be grown in containers.
Growing Watermelon Vertically
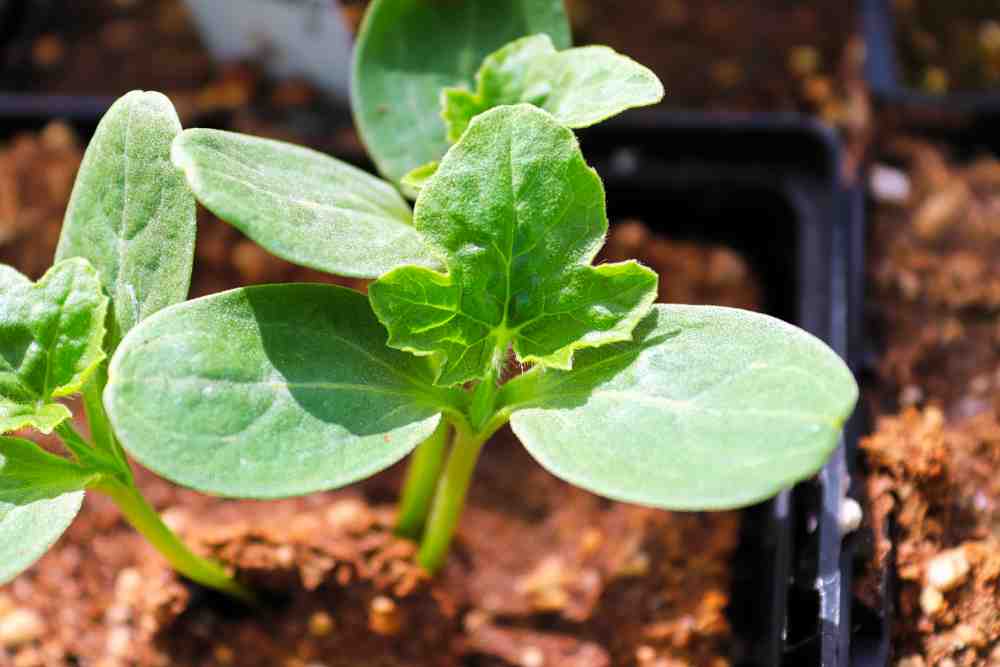
The first thing to remember while growing watermelons in containers is that they should always be started from seeds to ensure healthy, robust growth. Start your seeds indoors to offer your crop the best chance of growth in cooler climes.
Additionally, at least two weeks before your region’s last date for frost, you can buy seedlings from a nursery. Planting outside after all threat of frost has passed helps ensure that your plants have enough warm weather during their growing phase to reach maturity.

The roots of young watermelon plants are extremely tender and are often harmed during transplantation. Consider the length of the seeds when you’re getting ready to sow your watermelon seeds.
The hole you should use to plant them should be around three times deeper than the length of the seed. Place three seeds in each container, one in each hole. Remove everything except the healthiest plant from each pot once the seedlings have emerged and are flourishing.
If you wish to begin the growing season earlier, you may keep your planted pots indoors. Another choice is to start your watermelon seeds indoors in little biodegradable peat terracotta pots. Then, once the threat of frost has gone, you may transplant them to their bigger outdoor containers.
The roots won’t be harmed during this method of transplantation because you’ll be putting the complete peat pot with your seedling inside it into the bigger container. In addition, peat pots decompose and enrich the soil with nutrients.
The seeds can be put outside in sandy loam soil once they have developed steadily and strongly in a pot. Put them on a south-facing window or a sunny windowsill, so they receive plenty of light for at least eight hours.
If this isn’t possible and the climate is particularly chilly, place a grow light a few inches above the freshly planted seeds. A seedling heat mat can also be utilized to maintain a temperature of about 80 F. This will support healthy growth and generate strong seedlings for transplanting into the outdoor garden.
Training Your Watermelon To Climb A Trellis
Like many other vining plants, growing your plant on a trellis involves pointing the vines in the appropriate direction. First, tie loose loops around the vine to keep it in place on the trellis. However, you never want to stop the “circulation” in the vine.
Thus, we advise utilizing big fixed loops that serve to keep the vine close by while also allowing it to wave loosely. Using a longer tie and wrapping one end around the vine and the other around the support of the trellis are two additional options. This can be useful for training because a small amount of strain can be left to “pull” the vine up the trellis.
Your vines require gentle prodding to climb vertically rather than creep across the ground. Always handle vines gently. If a vine doesn’t easily redirect toward a trellis, plant a stake halfway between the vine and the trellis, and train it to climb the stake by loosely tying it to the stake. After a couple of days, the melon plant will move naturally in the direction you’re holding it, enabling you to manipulate the vine higher up the trellis.
You just need three things:
- Vertical Supports – Vertical supports can be nearly anything: a rose trellis, an old fence pushed up on a t-post, chicken run fencing, a chain link fence, three slender logs placed on end and roped together in a teepee, and so on. Whatever you decide, make sure it can handle the weight of two to three watermelons per plant.
- Watermelon Hammocks – There are many ways to support your watermelons as they grow, including watermelon hammocks. Make a hammock out of netting, a bag, or a flexible fabric to support the fruit.
- Soft Ties – Once the vine reaches the horizontal roof panel, the watermelon can develop without your assistance. If you are not growing over the top of the chicken coop, you will need to physically tie new vine growth to the trellis about each week.
Watering, Fertilizing, and Harvesting

Watermelon plants require regular watering to yield good fruit. Depending on the weather, it is advisable to water the melon plants deeply once or twice a week. Water the plants from the bottom to avoid wetting the leaves, otherwise, it can lead to diseases.
In addition to watering, it is critical to fertilize the watermelon plants regularly. A balanced fertilizer, like a 10-10-10 combination, or a fertilizer developed specifically for fruiting plants can be used. For optimum results, follow the instructions on the package.
It normally occurs 80-90 days after seeding and 30-60 days after blossoming. When the watermelon is fully ripe, cut the stem with a sharp knife to harvest it. When tapped, the fruit should make a hollow sound, and the skin should feel tough to the touch. You may eat your delicious and juicy watermelon straight from your container garden!
Benefits Of Growing Watermelon In Containers

First, warm soil is ideal for watermelons. The seeds or transplants won’t grow if you plant them in chilly soil; the seeds may even rot before they sprout. In the spring, soil in containers typically heats up considerably more quickly than dirt in the ground.
Also, growing in dark-colored containers or black grow bags will cause the soil to warm up more quickly since it will absorb the sun’s rays. This implies that you can start your watermelon seeds or transplants a few weeks before you plant them. It saves your space as well.
Controlling the amount of moisture, watermelons receive is another advantage of growing them in containers. Watermelons are thirsty plants that need lots of water to survive. In-ground irrigation might be challenging to monitor, but containers make it easier. When growing plants in pots, it’s also very simple to forget to water them or to give them less care than they require.
Pest prevention is the last advantage. Instead of remaining on bare soil, watermelons cultivated in pots ripen while being placed on a deck, patio, or porch. This prevents the fruits from being contacted by slugs, pill bugs, wireworms, and other ground-level pests.
Conclusion
Finally, planting watermelons in pots vertically is an excellent technique to save space while producing a plentiful yield. Watermelon plants can be grown effectively in pots by utilizing a trellis, preparing the soil, providing continuous watering and fertilizing, and supporting the growing fruit. All summer, you may savor the delicious, juicy flavor of fresh watermelon with only a little work and dedication.

Lilani graduated with a bachelor of agriculture, with a specialization in biotechnology from the Wayamba University of Sri Lanka, as well as she is following a Master’s in Molecular Life Sciences. She has a passion for writing and communicating about agriculture topics and loves enthusing people about the botanical world.
- 20+ Chic Boho Bedroom Ideas for a Cozy and Stylish Retreat - June 20, 2024
- 12+ Modern Boho Living Room Ideas to Create a Unique Oasis - June 10, 2024
- 10 Stunning Canopy Bed Ideas for a Dreamy Escape - May 16, 2024