Raised Bed Gardening for Beginners: A Comprehensive Guide
Are you tired of buying all those non-organic vegetables from the market? Are you fed up with spending a lot of money on vegetables every week? How about growing the best vegetables and fruit you’ve ever eaten in your garden? This post is for you!
Depending on the space and time you have available, you can grow vegetables in a single pot on your patio or on a larger scale. Select the most suitable location for your garden, preferably one that is easily accessible from your home.
Raised bed gardening is the easiest way to start your vegetable garden, especially for beginners. It is one of the modest ways of gardening. Growing vegetables in a raised bed will give you many benefits rather to growing your veggies on the ground.
Why Raised-Bed Gardening?
- Raised beds are ideal for growing vegetables in areas with poor water drainage, heavy soil, or soil that might contain undesirable contaminants. Raised bed garden gives full control over soil quality.
- A raised garden offers preferred drainage over most gardens as the soil that you put in your raised bed will be looser and not compacted like the regular soil in your yard. Because most plants cannot grow in standing water, drainage is essential for effective plant development.
- They also make it easier to keep the garden neat and tidy throughout the growing season. You can simply keep raised bed weed-free by building your raised bed soil over gardening fabric or a layer of black plastic. These are ideal for small spaces.
- Raised bed gardens are low maintenance when it comes to weeding. Due to the dense planting on raised beds, allows weeds to sneak in and establish roots. If you have persistent weeds in your garden, putting a hardware cloth between your garden bed and the groundworks nicely to keep them out of your crops.
- When compared to the soil on the ground, a raised bed warms up faster. This is why, unlike a flatbed, a gardener can plant vegetables and sow seeds in them early. The roots will appreciate the raised bed because it is spacious and allows them to spread out readily in search of nourishment. In a raised bed, as opposed to a garden, a plant can be planted more densely. A plant’s production increases will also increase. When compared to the plants that are planted on the path, raised beds can be set in wide rows and take up less space.
How To Start Raised Bed Vegetable Garden
Site Selection

This is the first and most important step. If you’re already a gardener, you know how to select the location. You need to select a site that receives at least 6 to 8 hours. Most vegetables need at least 6 hours of sunlight a day but some crops will grow well in less sunny spots for example, such as broccoli, spinach, and lettuce.
If you live in a cold climate, 6-8 hours of sunlight or more is preferable. If you reside in a hot climate, you’ll need to provide some shade to protect your plants from the hot summer sun.
choose a location that is suitable for the climate in your area. Avoid low, rainy regions where the soil can become saturated. Your location should also be protected from strong winds and have easy access to water.
The single most critical component of a successful garden is healthy soil. Your plants are fed by the soil. if your soil is thin and nutrient-deficient, you’ll have weak, unhealthy plants. Examine the soil’s quality. It will be possible to determine the pH, phosphorus, lime, potassium, soluble salts, and texture. To receive accurate results, contact your local cooperative extension service office for a free (or low-cost) soil test. They will provide recommendations for any essential modifications.
You can provide plenty of organic stuff, to help your plants grow. A loam with a texture that is neither too light (sandy) nor too heavy is good (clay) is good. Organic amendments (compost, humus, well-rotted manure) can be added to very light or very heavy soils to boost their water-holding capacity or improve drainage. Organic matter in large quantities is required — roughly one-third of the volume of soil is frequently desired, while less than 20% is often ineffectual.
If your soil needs to be replenished, the following things can help:
- Ground bark: produced from a variety of tree barks; helps to improve soil structure.
- Compost is an excellent conditioner.
- Leaf mold: nutrient-rich decomposing leaves that promote soil structure.
- Lime: helps loosen clay soil and improves the pH of acid soil.
- Sand: increases drainage in clay soil.
- Peat moss: a soil conditioner that helps soil retain water.
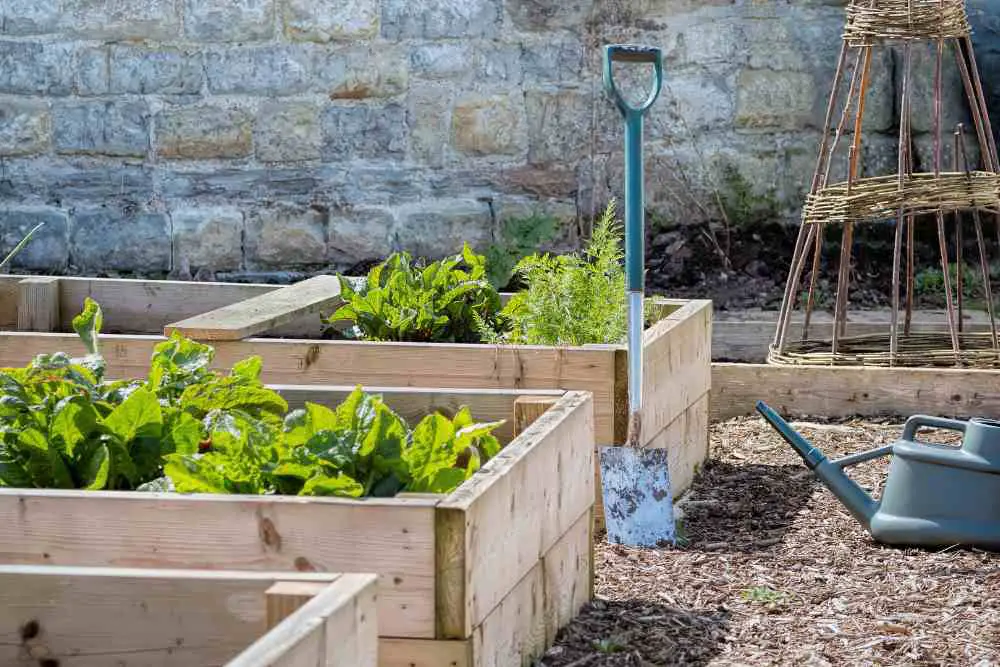
Build Your Raised Bed
Once you select the location now it’s time to clean it. First of all, you have to pull all the weeds and grass from your selected site you can dig the site with a shovel and then clean the soil from all the weeds. Weeds and grass can grow through your raised bed soil otherwise there will be a competition of water, sunlight, space, and nutrients between weeds/grasses and your plants. If your site is full of pests and weeds, you should perform soil solarisation to save your bed.
Solarizing takes 4-8 weeks, but it’s a great way to kill weed growth and seeds up to 2-3 inches below the soil surface. Solarization makes use of retained moisture and heat, and it’s best done during the summer’s warmest months. To solarize, mow the area as low as possible to the ground, then fully wet it – really soak it.
Then cover the area with clear plastic sheeting. This clear plastic allows more heat from the sun to penetrate the soil surface than black or cloudy plastic. The key to solarization is ensuring that the plastic edges are tightly sealed. Your goal is to keep all of the moisture trapped beneath the surface and prevent heat from escaping.
It’s ideal to bury the plastic’s edges in an inch or two of dirt. Throughout the summer, periodically inspect the area to ensure the plastic is still well-sealed. Cover any holes in the plastic with duct tape if they are poked during the solarization process. Don’t leave the plastic on for more than eight weeks. Some helpful bacteria in your soil will be killed by solarization, but they will quickly repopulate the region.
Remember that this procedure kills weeds down to about 3″ of soil, so digging after solarization will bring those deeper weed seeds back to the surface, causing you more trouble. The ultimate disposal of the plastic covering is one disadvantage of solarization. If at all feasible, recycle that plastic.
The most basic raised beds are built of mounded soil that is 0.5–1.5 meters broad from one ditch to the other. These measurements are determined by the soil. The bed should run from north to south to ensure that all sides receive equal amounts of sunshine.
Raised beds can be built from a variety of materials that can be obtained in a variety of ways. You can create a raised bed out of nearly anything, but while growing edibles, you must avoid using chemically treated materials. Rocks, brick, untreated pallets, metal, wood, mortared stone, cinderblock, and other materials are used to build raised bed gardens.
Brick – Wet the concrete foundation and, starting at one corner, lay a two-foot-long line of mortar down the center, about an inch thick. Place the first brick in the corner and tap it with the mortar trowel until the mortar is only about a half-inch thick. Apply mortar to one end of the next brick and place it 3/8th inch away from the previous. Tap it into place once more and brush away any extra mortar. Repeat until the first “course,” or row is complete. The second course should be laid in such a way that each brick overlaps two bricks from the row below. Continue overlapping the construction until it reaches the desired height.
Blocks of concrete – If the wall is only one or two courses high, mortar is unlikely to be required. Taller ones should be put out and mortared in the same way that bricks are. Some wall blocks have projecting tabs or lips built into their backs to keep them in place and prevent them from being pushed forward by the pressure of dirt behind the wall. There is no need for mortar with these blocks. Check the specific blocks you’re using and inquire about them at the store where you bought them.
Wooden Boards – A wooden box can be constructed ahead of time and then set in place depending on the size of the bed, or it can be built in situ. Firstly it’s important to level the ground beneath the frame. Earth and water can leak out where the wood’s edge doesn’t contact the ground, causing an increasingly huge hole at the bed’s edge. To keep the boards together, the simplest model is a small rectangle with metal brackets put into the inside corners.
Metal – They are extremely strong, stylish, and modern. Metal garden raised beds don’t rot with time, expand and contract with moisture, or need a lot of maintenance, in contrast to wooden raised beds. But, galvanized steel raised garden beds are an excellent alternative for extremely humid conditions.

Two brackets, one several inches above the other, at each corner will provide significantly more stability than a single bracket. Set your box in position once it’s completed, fill it with soil, and you’re done. A larger bed may be required, and corner posts rather than metal brackets will provide extra stability. If the boards will be sunk below ground level, dig a shallow trench for them. Posts should be sunk about a foot deep and as high as the wall. 4x4s work well.
What kind of wood should you use for your raised bed?
It’s a simple and inexpensive garden project. Wood is also a fantastic option if you want a more traditional look. Choose rot-resistant woods like cedar, redwood, or yew instead of pressure-treated woods.
Cedar raised garden bed: Cedar is the greatest choice for raised bed gardens since it is naturally rot-resistant and can last up to 15 years. It is also insect-resistant due to the oils in the wood. The drawback is that it is expensive. Although western red cedar is the most common, white and yellow cedar are equally suitable for outdoor use.
Plant Spacing
Don’t waste any space. Plant intensively to use your garden space wisely. The square foot, wide row, or french intense approach are all good options. When using the square foot technique, large plants like tomatoes, peppers, cabbage, eggplants, collards, and broccoli require roughly 1 square foot per plant.
4 plants per square foot can be planted with medium-sized plants like leaf lettuce, beans, and spinach. Carrots, green onions, and radishes, for example, can have up to 16 plants per square foot. Sweet potatoes require a large amount of area and should be grown in their own bed.
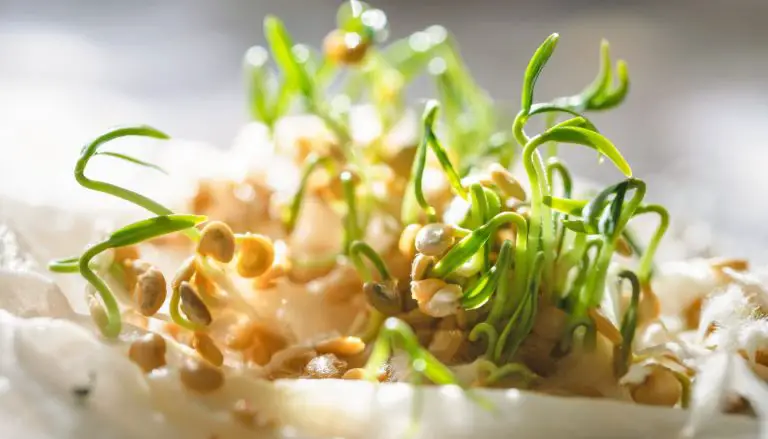
Sawing Seeds
Most garden vegetables, such as lettuce, beans, carrots, beets, chard, spinach, peas, cucumbers, and squash, can be sown directly where they will grow. For crops that take longer to mature, starting with tiny plants rather than seeds is a good option.
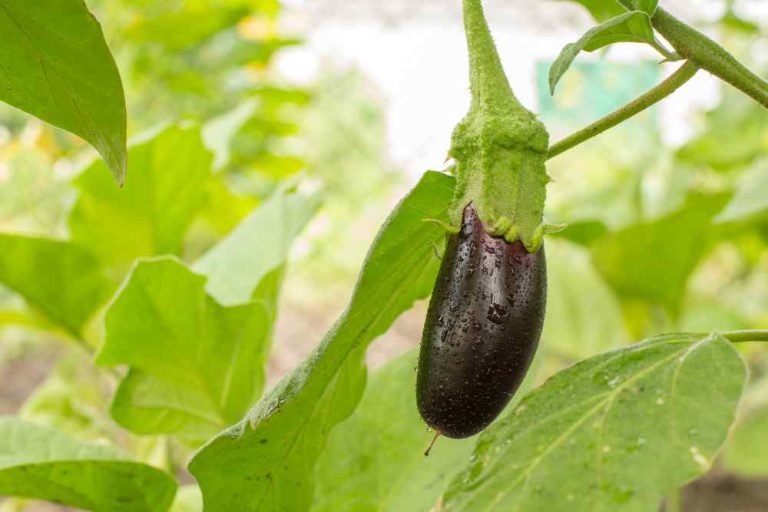
Purchase tomato, pepper, eggplant, and melon transplants (or start your own indoors 6 to 8 weeks before planting them outside). Consider a raised bed garden if you want to speed up the season because the soil will warm up faster in raised beds. If you choose to cultivate from seed rather than from young plants, make sure you purchase high-quality seeds. Seeds that do not germinate are a waste of effort and money.
Prepare yourself to care for your plants for the duration of the growing season. Remember that tomatoes and zucchini are at their peak growth in the middle of summer. If you are away for a portion of the summer, you must have someone look after the crops or they will suffer. Alternatively, you could grow cool-season crops like lettuce, kale, peas, and root vegetables during the cooler months of late spring and early fall. Choose foods that you and your family enjoy eating.
Guidelines For Arranging Your Vegetables
1. All vegetables are not planted at the same time. “Cool-season” vegetables such as lettuce, broccoli, and peas thrive in the cooler temperatures of early spring and fall. Tomatoes, peppers, and cucumbers are “warm-season” crops that are not planted until the soil warms up in late spring and summer.
2. Plant tall vegetables on the north side of the garden, such as pole beans on a trellis, to avoid shading shorter plants. If you do get some shade in your garden, reserve it for small, cool-season vegetables. If shade is unavoidable in some areas of your garden, reserve those areas for cool-season vegetables that benefit from the shade as the weather warms.
3. The majority of vegetables are annuals (planted each year). Provide permanent locations or beds if you intend to grow “perennial” crops such as asparagus, rhubarb, and some herbs.
4. Keep in mind that some crops mature quickly and have a relatively short harvest period (radishes, bush beans). Other plants, such as tomatoes, take longer to produce but produce for a longer period of time. Typically, the “days to maturity” are mentioned on the seed packet.
5. Plantings should be spaced out. You don’t want to plant all of your lettuce seeds at once, or else all of that lettuce will need to be harvested at the same time! Plantings should be spaced out by a few weeks to keep “em coming.”
Fertilizing
Plants require three primary nutrients: nitrogen (N), phosphorus (P), and potassium (K). Chemical/synthetic (non-organic) fertilizers contain these. The percentage of net nutrient content is indicated by the number of each nutrient contained in weight. A 100-pound bag of 10-10-10, for example, contains ten pounds of each element.
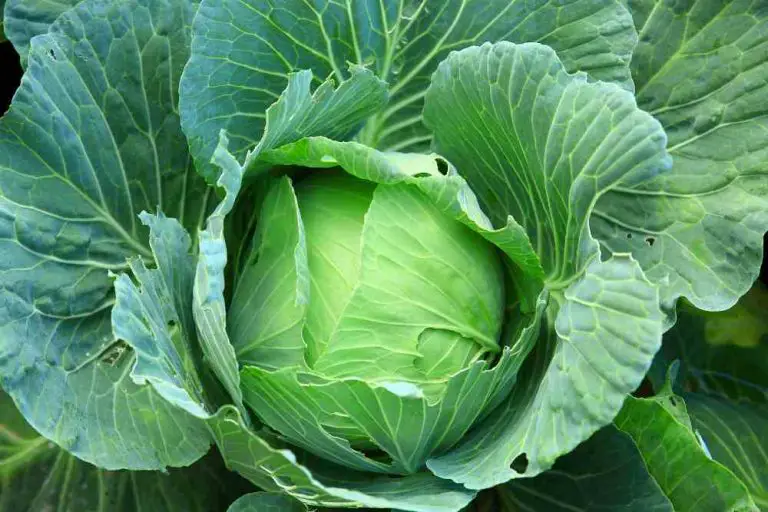
Nitrogen promotes strong leaf and stem growth as well as dark green color, which is desirable in broccoli, cabbage, other vegetables, herbs, and lettuce. To increase available nitrogen, add aged manure to the soil and apply alfalfa meal, fish meal, or blood meal.
Phosphorus promotes root and plant growth, including blossoming and fruit development, as well as seed formation; it is essential for cucumbers, peppers, squash, and tomatoes—any edible that develops after a flower has been pollinated. Add bonemeal (rapid-acting) or rock phosphate (slow-release) to increase phosphorus.
In-plant tissue, potassium is linked to the flow of water, minerals, and carbohydrates. It influences protein, starch, and adenosine triphosphate (ATP) production by activating enzymes within the plant. The rate of photosynthesis can be controlled by the creation of ATP. It is essential for corn, soybean, alfalfa, and potato.
During the growing season, woody plants and perennials absorb nutrients from the soil; while dormant, they require few nutrients. As a result, apply fertilizer as soon as the plants emerge from dormancy in the spring. Follow the label’s instructions for how frequently to apply (this depends on the type of fertilizer used).
After the first fall frost, stop applying pesticides. A fertilizing schedule that begins early benefits food crops as well. Some fertilizers “feed” lightly, while others are considered heavy feeders and require more frequent applications throughout the growing season.
Harvesting
Instead of harvesting the entire plant, harvest the leaves of your herbs, lettuce, collards, and cabbage. Throughout the season, these plants will continue to produce more leaves. After the main head of broccoli has been harvested, it will produce side shoots.
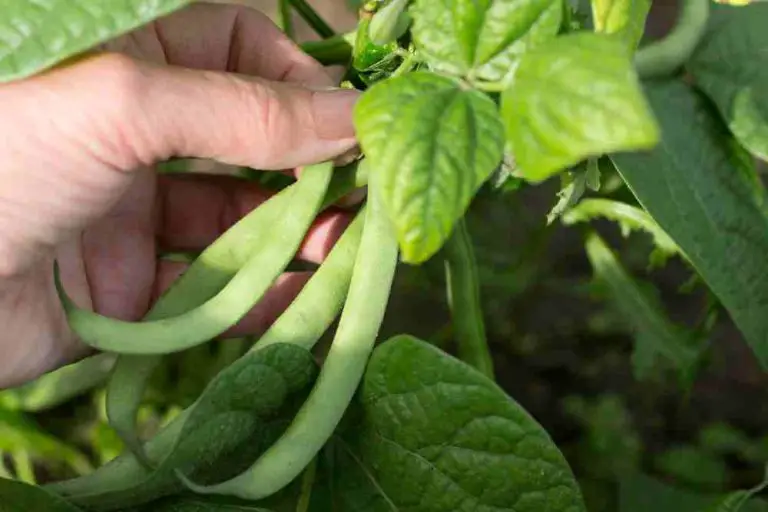
For a continuous harvest, grow pole beans rather than bush beans. Plant indeterminate tomatoes (these continue to flower and bear fruit for months). Plant a batch of plants every 2 weeks to extend your harvest of plants that are harvested only once (radishes, carrots, cauliflower, green onions, beets, determinate-type tomatoes, bush beans)
Plant another crop as soon as one crop is finished for the season. If it’s hot and the sun is shining brightly when you’re planting, use a fan-shaped palm leaf to shade the transplants and seedlings (such as a palmetto frond). Place the palm leaf on the young plants’ south side. You can remove the palm fronds after a week or two.
It is not necessary to plant all of the seeds in a seed packet. The majority of seeds can be stored indoors for a year or two. If you want to grow sweet potatoes, place one sideways in a shallow bowl with water halfway up the sweet potato. After a few weeks, you can take vine cuttings and plant them.
What Are The Vegetables You Can Grow In Your Raised Bed?
Root vegetables
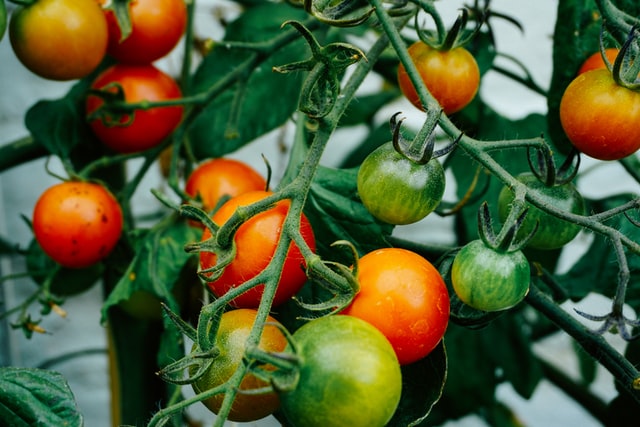
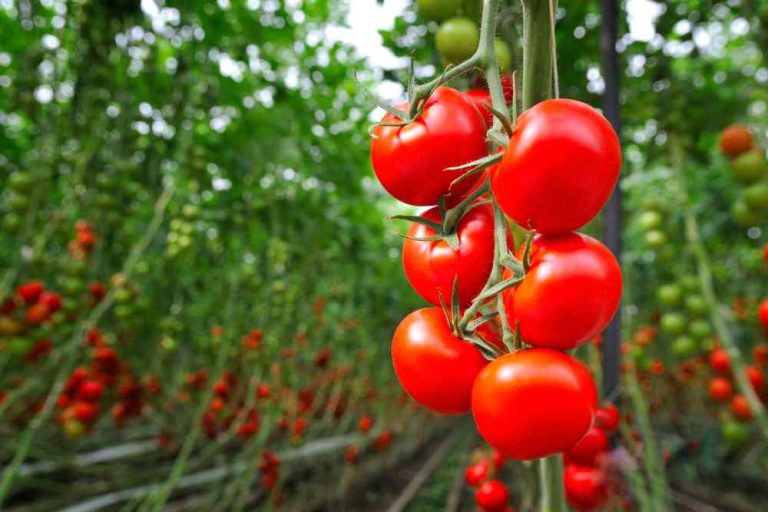
Every owner of a raised bed should grow tomato plants. Numerous tomato varieties can be grown in a raised bed. Because tomato plants are heavy feeders, they typically require at least 8 hours of sunlight, as well as more water and nutrients for better growth.
It is critical to properly space your tomato plants for maximum yield. You can easily customize the soil in your raised bed to your specific needs by adding extra compost as you fill the beds. The only disadvantage of growing tomatoes in raised beds is that tomato cages and stakes are more difficult to stand up in the loose soil.
Cucumbers are classified into two types: bush and vining. You can grow either one in a raised bed, but if your raised bed is small and you want to grow vining cucumbers, a trellis may be necessary. Cucumbers that are trained will grow right up the trellis, making the fruit easy to spot and pick. Cucumber seeds should be planted 6 inches apart and no deeper than 1 inch.
Carrots, beets, radishes, and parsnips are examples of root vegetables that work well in raised bed gardens. It is critical to have complete control over the soil when growing vegetable plants for their roots. You can fill your raised beds with the perfect soil to suit your needs; and free of rocks, clay, and debris that could hinder the growth of roots or cause misshapen veggies.

Carrots are an easy vegetable plant to grow as a beginner, so raised bed soil is ideal for planting them. Place the carrot in a glass of water and cut off the bottom. The leaves will grow in a few days, and you can now plant them in your raised bed soil. Carrots are simple to grow and do best in a raised bed. Carrot seeds are very small and must be planted about 14 inches deep. Water the carrots gently, being careful not to wash away the tiny seeds.
You may want to plant twice as many seeds as you possibly predict growing in your space. You must thin the carrots as they grow to ensure they have enough space. Radishes make them perfect for growing in raised beds as they are one of the fastest-growing vegetables. In 35 to 60 days, the radishes will be ready to harvest. After that, lightly cover them with soil and water them carefully. For a continuous harvest, sow carrot seeds in succession throughout the season.
Radishes are one of the fastest-growing vegetables, making them ideal for growing in raised beds. Radishes will be ready to harvest in 35 to 60 days, much sooner than larger plants. After that, lightly cover them with soil and water them carefully.
Onions are another excellent vegetable for raised beds. They prefer quick-draining soil, plenty of organic matter, and a long growing season. Raised bed soil can be customized to your specific needs; for example, if you know you’ll be planting onions in the raised bed, make sure to incorporate plenty of compost. Onions grown from seeds can take up to 100 days to mature.
In a raised bed garden, potatoes grow nicely and are much easier to harvest. Potatoes require soil that is loose and loamy and drains well. Potatoes thrive in loose soil, which allows them to spread out more quickly and prevents them from rotting. You may have perfect control over the soil in a raised bed garden. Potatoes grown in raised beds produce larger tubers and higher yields.

In raised bed leafy green vegetables such as Lettuce, Spinach, and Kale plants will perform marvelously. These cool-weather crops need to be planted just as soon as you can get a trowel into the soil because the soil in raised beds warms quickly compared to the ground.
Potatoes grow well in raised beds and are also much easier to harvest. Potatoes require loose, loamy soil that drains well. Potatoes grow best when they can spread out freely in the soil, and this loose soil prevents them from rotting. You have complete control over the soil in a raised bed garden. Potatoes grown in raised beds produce higher yields and larger tubers.
Raised beds are ideal for growing leafy green vegetables like lettuce, spinach, and kale. These cool-weather crops should be planted as soon as you can get a trowel into the soil. The fact is that raised bed soil warms up faster than ground soil. Another reason that leafy greens are ideal for raised beds is that they dislike soggy roots.
Growing lettuce in a raised bed is absolutely a charm. It is very simple to grow, and lettuce plants look lovely in a raised bed. You can easily grow lettuce from seeds, seedlings, or store-bought lettuce. Lettuce is an excellent addition to any raised bed and grows quickly. Plant lettuce seeds near tomatoes, peppers, and other larger plants. It will be ready for harvesting before the larger plants mature.

Lilani graduated with a bachelor of agriculture, with a specialization in biotechnology from the Wayamba University of Sri Lanka, as well as she is following a Master’s in Molecular Life Sciences. She has a passion for writing and communicating about agriculture topics and loves enthusing people about the botanical world.
- 15 Ingenious Kitchen Garden Ideas to Cultivate Freshness Right at Home - April 7, 2024
- 10 Top Picks Best Plants for Open Terrarium - April 2, 2024
- 21 Easy and Cheap Walkway Ideas for a Charming Garden - March 31, 2024