
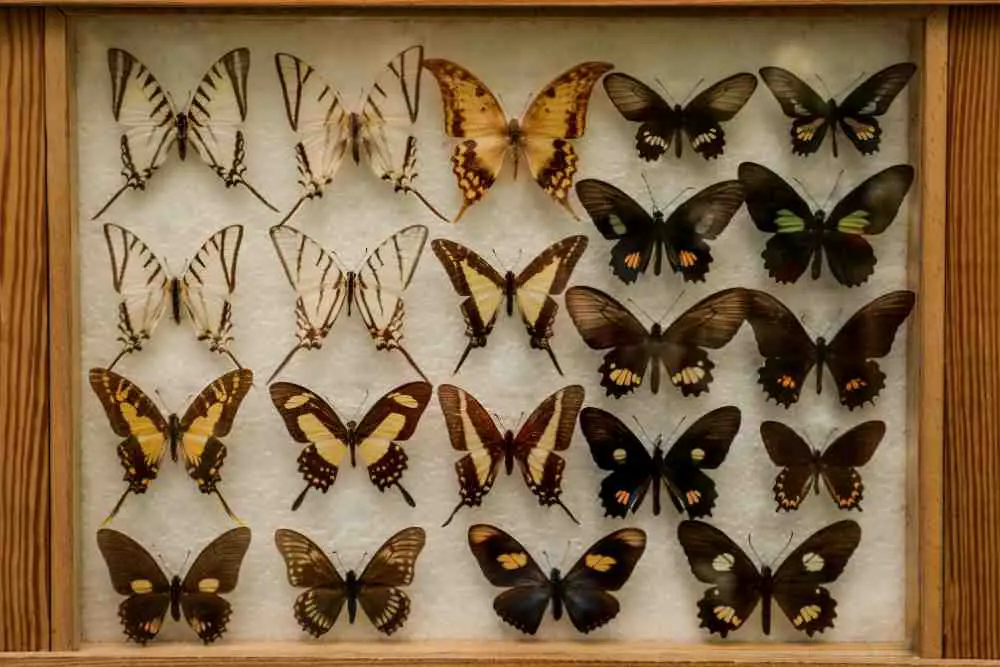
5 Specimen Preservation Techniques
Long-term preservation of organisms either plant or animal in the best possible condition is known as specimen preservation.
Why are Specimens Preserved?
- For the botanical and zoological museum collection
- For morphological studies
- Taxonomic reasons
- For detailed examination(on disease symptoms, nature of pest attack)
How Do Collect and Preserve Insects?
Preservation of insects is the best way of learning about insects. It enables us to learn more information than books. And it enables us to identify insects and relevant crops. Before proceeding to collect insects, we should assemble a collecting kit.
It includes killing bottles, pooter/aspirator, hand lens, pen-knife or scalpel, entomological forceps, scissors, sweep net and insect net, forceps, beating tray, notebook and pencil, and small boxes. Every killing bottle uses a killing agent (formaldehyde).
Where to look for insects?
- On plants (each plant will attract certain species)
- In the air (when flying)
- Leaf litter or debris
- Under stones or any other objects
- Under barks
- In dead logs
- Inground
When to look for insects?
- Daytime in the garden
- Near porch light at night
- Collecting throughout the year(some adult of insects are active at different times of the year)
Mainly there are several methods to collect insects. Like handpicking, sweeping, insect/butterfly net, beating, trapping, and aspirator.
1. Hand-picking – This method is used for large insects, for example, beetles and grasshoppers. Insects are picked up by hand and placed in a container. When insects are found on leaves or small branches, break off the leaf or branch and put it in a container.
2. Sweeping – This is a suitable method for collecting most insects like grasshoppers and bugs. Generally, collect insects from pastures. A sweep net is a bag made out of batt (white cotton fabric). The mouth is about 30 cm in diameter. The whole bag is 65 cm long. The mouth is supported by a metal ring. The handle is made out of wood/metal, and its length is about 40 cm. in the process, the sweep net is used to sweep on herbage. After a few strokes, the insects are collected from the inside of the net with an aspirator.
3. Insect / Butterfly net – This is simple nylon or mosquito net. It catches insects in flight. Insect Net is a light, strong, and fairly open mesh. Its size may vary. The handle is about 2.5 – 3 ft in ling, and the rim is about 1 ft.
The badge should be about twice as long as the diameter of the rim and rounded at the bottom. Best used on sunny days and afternoons. There are two general ways to use the net. One is looking for an insect and swings it. Simply swing the net through vegetation (sweeping). The second one requires speed and kill.
Quickly turn the net handle to fold the bag over the rim to prevent their escape before removing insects from the net. Take care to prevent their escaping. Take care not to damage the insect and be aware of the bite or sting of insects.
Many ways can be used to remove insects from the net, grasp insects using fingers, and remove them from the net. Insert a box or bottle into the net and get the insect directly into this container. Place the end of the net into a killing jar to kill insects. Remove the insect with an aspirator.
4. Beating – A beating tray is held under a branch. Then hit sharply with a stick. It’s suitable for collecting insects that rest on branches.
5. Trapping – Use the absence of the collector night. Some trap directly caught insects eventually into a container of alcohol or killing jar. Types and attractants vary according to the insect. Many ways can be used to remove insects from the net, grasp insects using fingers, and remove them from the net. Insert a box or bottle into the net and get the insect directly into this container.
Place the end of the net into a killing jar to kill insects. Remove the insect with an aspirator. Light trap these traps are for nocturnal insects. It consists of a light source and collecting containers. The light source is an electric light bulb. The most efficient light trap is a mercury vapor lamp.
Sticky trap – Use collect insects that are active during both day and light. It consists of a cylinder covered with a sticky material. This is set up at crop level or at any suitable height.
Water trap – It consists of a shallow stray 12.5x 20 cm deep containing water. The inside of the tray can be painted white and yellow to attract insects. Add a few drops of detergents (teepol) to break the surface tension. It can be kept on the ground or set up on support at the crop level. This is not suitable for the rainy season.
Pitfall trap – It consists of a container with a large central hole; e.g., a jar/rectangular through the trap is buried so that the top is flush with the ground level. It’s suitable to collect insect which moves on the surface of the soil. E.g., Ground beetle
Baits – This is a special type of trap. It places attractive substances.
- Ripe fruit – butterflies
- Fruit juice – fruit fly
- Decaying meat or fish – house flies
Pond net – It collects aquatic insects. The pond net is made of fine nylon netting. Usually, then a butterfly net but has a long handle. The net is put into the water at various depths and then pulled quickly.
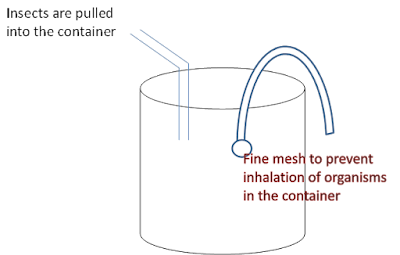
6. Aspirator – It is a device with which insects are sucked into viral or other containers. This container has an intake and a mouthpiece tube. The inner end of the mouthpiece tube is covered with a piece of cloth to prevent insects from being sucked into the mouth. Place the end of the intake tube close to the insects and suck through the mouthpiece.
Killing insects
Any wide-mouthed jar can be used to make a killing bottle. The jar should have an air-tight lid. The bottom should be lined with a layer of plaster of Paris/cotton/cloth. Add a suitable poison like ethyl acetate (safe and sufficient), chloroform, tetra chloro-ethane, cyanide, carbon.tetrachloride.
Boxes and envelopes
These are used to keep insects after being killed. In the field, an envelope can be made using triangular paper. Butterflies and moths are place in the envelope with the wings together above the body. Write collecting data on the outside of the envelope.
Mounting and preserving insects
There are two main methods for preserving insects.
- Pickled (store in the form of liquid preservation)
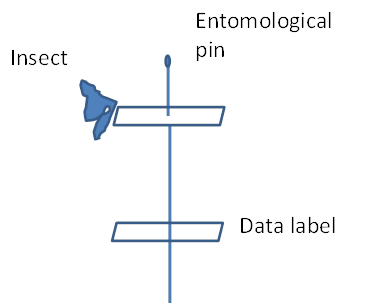
- Pinned (attached to entomological pins, dried, and stored in insect boxes or cabinets).
Pinning and Drying
This is the method adopted for keeping insects in boxes and cabinets. Use special stainless steel pines. After killing insects spreads on a pinning stage, and rustles pin is pushed through the thorax. The pinned specimen is placed in a drying cabinet for a few days to dry and become well preserved slowly.
Method of pinning
- Direct pinning
- Carding
- Triangle carding
- Micro pining or staging
- Setting/ spreading
1. Direct pinning

2. Carding – The insect is placed on a white rectangular card.
3. Triangle carding

4. Micro pinning/staging
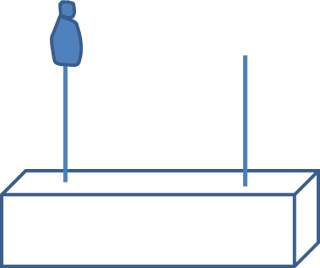
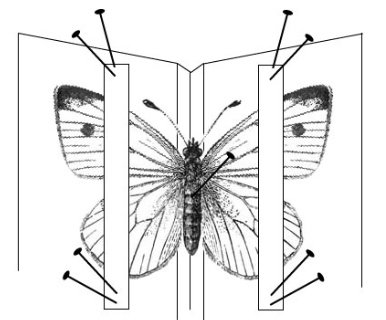
5. Setting/ spreading – Spread the wings /legs in a horizontal position on a standard-setting board.
Temporary storage
Keeping insects is to enclose them nearly between two layers of cotton wool (with relevant data on a piece of card). Wrapped in an old newspaper cut like an envelope.
Drying of the insect specimen
The specimen should be dried well to keep for a long time. Small insects can be dried by keeping them at room temperature. Not well-dried specimen discolored or emitted a bad odor.
Pinned large specimen- sun-dried keeping box with a glass lid or cardboard box, electric bulb fixed or in the oven. The label should have the following things.
- Name of the insect
- Crop
- Locality/ place
- Date
- Collector
Insects are very brittle when dry. Careless handling of the pinned specimen can result in loss of legs, antennae, or other parts. Finally, a specimen can be transferred to a display box in a particular arrangement.
How to press and preserve plant parts
The collected plant/ plant part is put into a rigid container or a plastic bag until it is preserved (moist towels are used to prevent it from wilting). Clean up the pant ( brush off loose soil and blot off moisture). Arrange the plant on a sheet of newspaper. Next to it, place the identification tag with,
- Its name
- The number you have assigned to
- The location where it was collected
- When it was collected and by whom
- Place another piece of newspaper on top of the plant
Place your newspaper’s piece with your specimen inside between two pieces of blotting paper, then between two pieces of corrugated cardboard, to allow air to circulate. Place the resulting package in the plant press and gently screw it down. As an alternative place, some heavy objects(book, brick) are on top.

Check the plant every two or three days and replace the damp papers with dry ones. It will take from two to four weeks before the specimens are completely dry. The dried plant/ plant part mounts on a white paper sheet and tags its essential information.
Certain groups of plants are soft, bulky, or otherwise not amenable to drying and mounting on sheets. For these plants, other methods of preparation and storage may be used. Flowers, fruits, and some leaves are pickled in formation formalin to preserve their three-dimensional structure.
These specimens are stored in labeled boxes (conifer cones, palm fronds). Small specimens are often air-dried and packaged in small paper envelopes (mosses, lichens).

Lilani graduated with a bachelor of agriculture, with a specialization in biotechnology from the Wayamba University of Sri Lanka, as well as she is following a Master’s in Molecular Life Sciences. She has a passion for writing and communicating about agriculture topics and loves enthusing people about the botanical world.
- Outdoor Deck Decorating Ideas That Turn Any Backyard Into a Stunning Retreat - June 30, 2026
- 29 Bucket Gardening Ideas for a Lush, Compact Garden - October 30, 2024
- 20+ Chic Boho Bedroom Ideas for a Cozy and Stylish Retreat - June 20, 2024