9 DIY Automatic Watering System for Indoor Plants: A Step-by-Step Guide
It’s time to relax and forget about your responsibilities! But before you leave, ensure your plant kids are safe – you’ve taken such good care of them, and you’d hate to see them wither away when you return. There are simple, inexpensive, and long-lasting solutions for this. Your plants don’t require a nanny, as we’re here to demonstrate. Each automatic plant watering system will put you at ease while you’re at the beach.
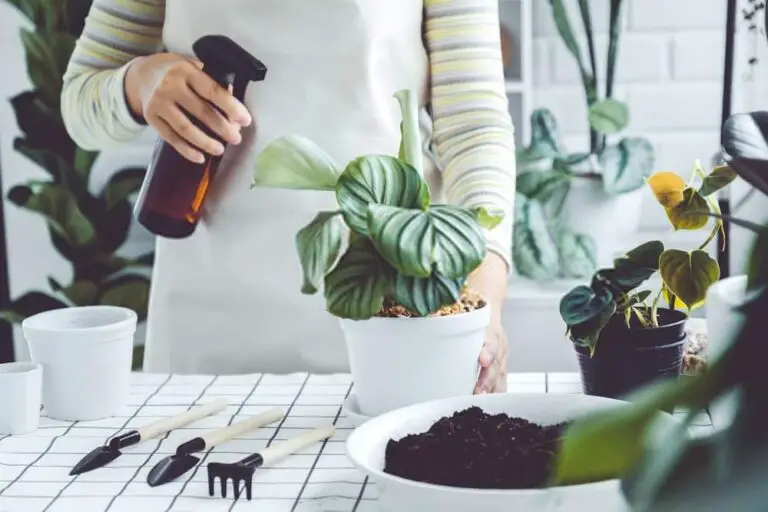
You may purchase self-watering planters for your plants, but creating your own is less expensive and can help you save money. This is ideal for busy gardeners and travelers who want to keep their plants alive, healthy, and not overwatered.
DIY automatic watering system for indoor plants are low maintenance and have modern designs that promote plant health. Gardeners who desire to conserve water will find these devices helpful. In a self-watering pot, the overflow system serves as a drainage hole and gathers extra water at the bottom to prevent root rot.
Some use the exact quantity of water required, reducing water waste, while others include an integrated moisture-wicking mechanism. Various high-tech DIY self-watering pots can give your plants water for three to four weeks.
How to Make Your DIY Self Watering Systems
1. Glass Bottle Solution
Don’t throw away your empty Sauvignon Blanc bottle; it’s perfect for watering plants while you’re away. Alternately, employ this technique consistently to reduce the amount of watering you need to do. It can also be a creative and enjoyable ornament to add to your planter or pot if the bottle has an eye-catching design. Use a bottle with a cap instead of a cork, please. After your plant has consumed all the water, you can refill the bottle with this solution to use it again.
- Step 1: Make holes in the cap. Remove the plastic film from the cap using pliers.
- Step 2: Then, using a nail, hammer it through the aluminum cover to make five tiny holes. To prevent the cap from warping, begin by nailing the hole from the inside.
- Step 3: Put water in the bottle. Remove the bottle’s cap and cram it full of water. Put the lid’s cap back on.
- Step 3: Put the bottle in the ground. Before watering the plant, make a hole in the soil. Insert the bottle cap-side first into the hole you created. Restock after a long weekend
2. Tiny Plastic Bag Greenhouse
This technique is incredibly easy to use and a terrific long-term option when you’re away from your plants. There is no need to construct walls or a roof. To prevent damaging the leaves of your plants, be sure to follow the directions on this method. Avoid using this technique with succulents or in direct sunshine because it could cause them to shrink or overheat.
- Step 1: Place the wood stakes. Place one of the four wood stakes in each corner of the pot. This will serve as the basis of the greenhouse plastic bag tent to prevent the plastic from encircling the leaves.
- Step 2: Put some water somewhere with some shade. Do not overwater your plant; water it as usual. Because direct sunshine will heat the plastic bag too much and potentially kill your plant, keep your plant in indirect sunlight.
- Step 3: Using the plastic bag, wrap your plant. Choose a plastic bag that is big enough to enclose your plant completely. Ensure the stakes are sufficiently spaced so the leaves do not touch the bag as you wrap your plant in the plastic bag. It’s acceptable if a few of the leaves touch the bag. Water droplets will return to the plant after being captured in the miniature greenhouse when it evaporates.
3. Wick Watering System

An easy way to water your plants without complicated components is with a wick watering system. One end of a wick is placed in the plant’s soil, and the other end is submerged in a water container. The wick absorbs moisture from the reservoir and disperses it into the soil as it dries up. These are perfect for setups that last fewer than a few weeks because the reservoir must be filled to function. Only water is required; otherwise, root rot may result.
- Step 1: Attach a bolt to the end of each shoelace you intend to use.
- Step 2: Completely submerge the shoelace in water.
- Step 3: Place the shoelace’s bolt end in the bucket made of plastic.
- Step 4: Set the bucket above the plant pots and fill it entirely with water.
- Step 5: After giving your succulents light watering, bury the shoelace’s non-bolt end a few inches into the ground.
- Step 6: Because the water will seep into the soil gradually over time, you won’t need to water them.
4. Plant Saucer Setup
Although this approach is among the easiest, you shouldn’t generally use it for plants that require special care. While you’re away, everything will stay neat and orderly thanks to using saucers, which also help your plants retain water.
- Step 1: Pick a saucer. To ensure that the saucer touches the entire bottom of the pot while still having space to hold water, use a saucer that is almost the same size as the pot or even a little larger.
- Step 2: Set the pot with your plant inside. The plant must be able to access the water in the saucer; hence it’s crucial to use a drainage pot.
- Step 3: The saucer should be soaked or filled with water. For the plant to have access to additional water while you are away, run the saucer under water or fill it with water.
5. Drip Watering System
This system functions by gently and steadily dispensing water through a drip emitter. As the primary source that requires irrigation, this hose is positioned immediately beneath the soil to allow the water to reach the roots. Depending on what you need from it, a drip irrigation system might be as straightforward as a single hose or span the entire garden. This setup necessitates you turn it on and off at the faucet unless it is tied to a timer, which can be done once or twice weekly.
- Step 1: Find the optimal location for your soaker hose beneath the soil where your plants will be by digging a few inches into the soil. You want it to follow the plant roots parallel to each other without getting in the way of any of them.
- Step 2: Set up the soaker hose in the desired location, then attach the other end to the garden faucet.
- Step 3: Once the hose is in place, use the wire garden pins to secure it.
- Step 4: Spread some garden mulch over the freshly fitted hose, but avoid covering it with soil.
- Step 5: Open the garden faucet so your plants can receive gentle watering.
6. Capillary Mat
The capillary mat is located between the plant bath and the wick system. It is named for the “capillary action” mechanism, which transfers water from a reservoir to the soil (and then onto the roots of plants) via an absorbent substance. This self-watering method is only appropriate for readily transportable plants in pots with drainage holes, similar to the plant bath.
Although capillary mats are simple to acquire at gardening supply stores, there is a DIY method that you may use to construct your own.
- Step 1: Add water to the tray to ensure the fabric is moistened but not completely submerged.
- Step 2: The fabric must hang down to contact the tray because it will act as a wick when you set your freshly watered potted plants on top. This will guarantee it stays in contact with the water while the plants consume it.
7. Houseplant Bath

You take baths and may have washed a pet in the past, but did you know you can also bathe your plants? You can absolutely let your plants soak in some bath water while you’re away for a week. Considering that the bathroom is typically the area with the least light, remember that this strategy works best for plants that demand a lot of water, such as tropical plants and indoor plants that don’t require much daylight.
- Step 1: Fill up your sink or bathtub. Fill your sink or bathtub with a few inches of water, depending on how many plants you need to take care of while you are gone.
- Step 2: Spread a towel over the sink or tub to protect it. To prevent the plant pots from damaging the tub or sink, spread out a towel over the water.
- Step 3: Set your plants on the bath towel. Before placing the plants in the tub or sink, please ensure that they are in pots with enough drainage so that the water may soak into the roots. This strategy should keep the plant alive for at least a week.
8. Plastic Bag Wick System
This is a variation of the simple wick method in which you place a resealable plastic bag with a thread poked through the bottom next to each plant in the container. You’ll need to collect a needle, some thread, and various resealable plastic bags for this creative way to water your houseplants automatically.
This project requires the use of a very fine needle, ideally a 10 needle; however, any needle in the 8–12 range would do. This is because you need the thread to wick the water to the plant rather than letting it leak out of the hole you made in the bag.
Thus, the hole must be extremely small. If you need to enhance the water flow to the plant, you may always use more than one bag for that plant or insert a second thread through the bag. The drainage rate depends on the size needle and the kind of thread you’ve chosen, and you’ll need to test your system to ascertain it. How to set up a wick system bag is as follows:
- Step 1: Thread your needle with approximately 8 inches (20 cm) of thread. Make sure the knot you tie the ends in won’t be too little to fit through the hole you will make in the bag.
- Step 2: Carefully insert the needle from the interior near the bottom of the bag. Trim the thread just in front of the needle.
- Step 3: Fill the bag with water and place it on top of a container with the wick hanging down to gauge how quickly the water will drain from it. After one hour, measure how much water has dripped into the container.
- Step 4: When deciding what size and/or how many bags to lay on top of the wet soil next to each plant, ensure the wick contacts the soil but the hole is not. This drainage rate can be used in conjunction with the data you’ve obtained about your plants’ watering requirements. Larger bags should be supported with chopsticks or something similar to stop the upper portion from falling over the pot’s side as it empties.
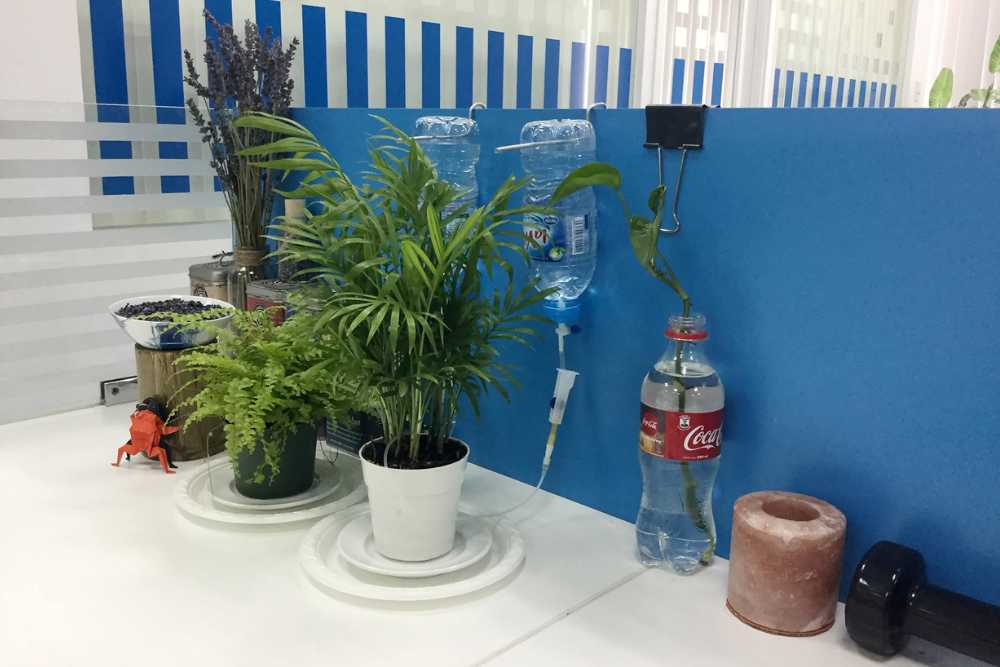
9. Plastic Water Bottle Planter

Plants also drink from water bottles, so recycling plastic water bottles is a terrific method. Despite the system’s short lifespan, the technique is one of the simplest to set up and reuse. Refill the bottle as needed!
- Step 1: The bottle has puncture holes. Take the water bottle, and drill around six holes along the sides and three holes along the bottom.
- Step 2: Into the ground, bury the plastic bottle. The self-watering method will last longer if you first water your plant’s soil. This will prevent your plant from consuming the entire water supply from the bottle first. Insert the plastic bottle in a hole in the ground, exposing the cap and a little portion of the water bottle.
- Step 3: Put more water in the bottle. To prevent the water from evaporating and instead allow it to drain into the plant, fill the bottle with water and cap it. This method works well for plant owners who take long weekends off or don’t water their plants daily. Simply refilling the water container will allow you to apply this technique again.

Lilani graduated with a bachelor of agriculture, with a specialization in biotechnology from the Wayamba University of Sri Lanka, as well as she is following a Master’s in Molecular Life Sciences. She has a passion for writing and communicating about agriculture topics and loves enthusing people about the botanical world.
- Outdoor Deck Decorating Ideas That Turn Any Backyard Into a Stunning Retreat - June 30, 2026
- 29 Bucket Gardening Ideas for a Lush, Compact Garden - October 30, 2024
- 20+ Chic Boho Bedroom Ideas for a Cozy and Stylish Retreat - June 20, 2024