How to Maintain and Sanitize AeroGarden: A Complete Guide
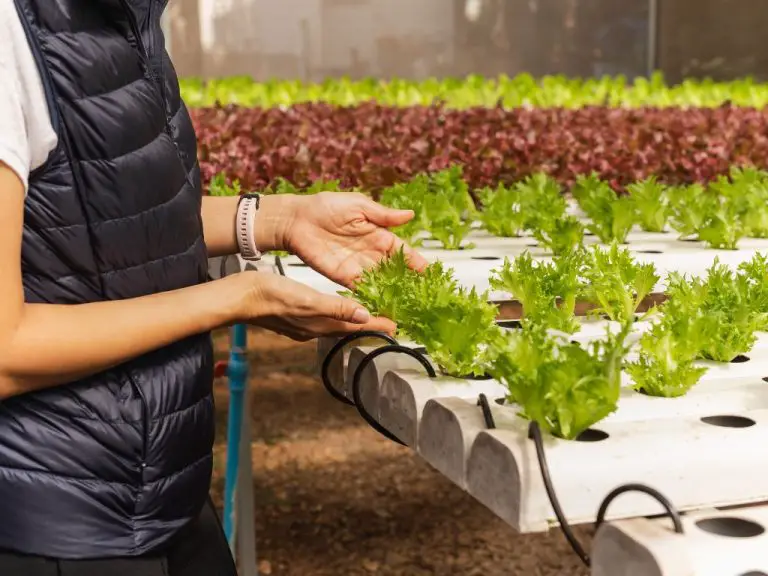
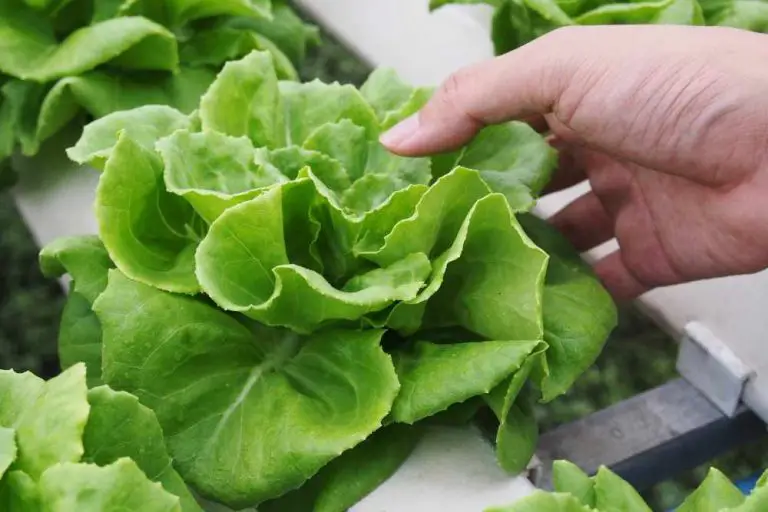
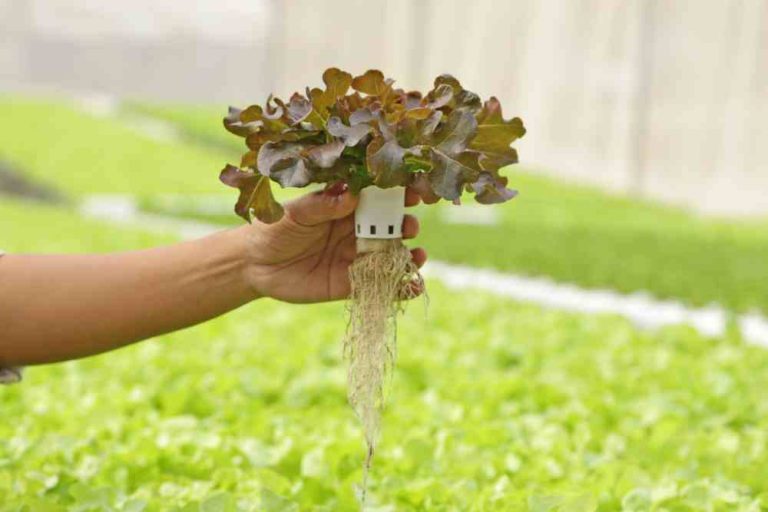
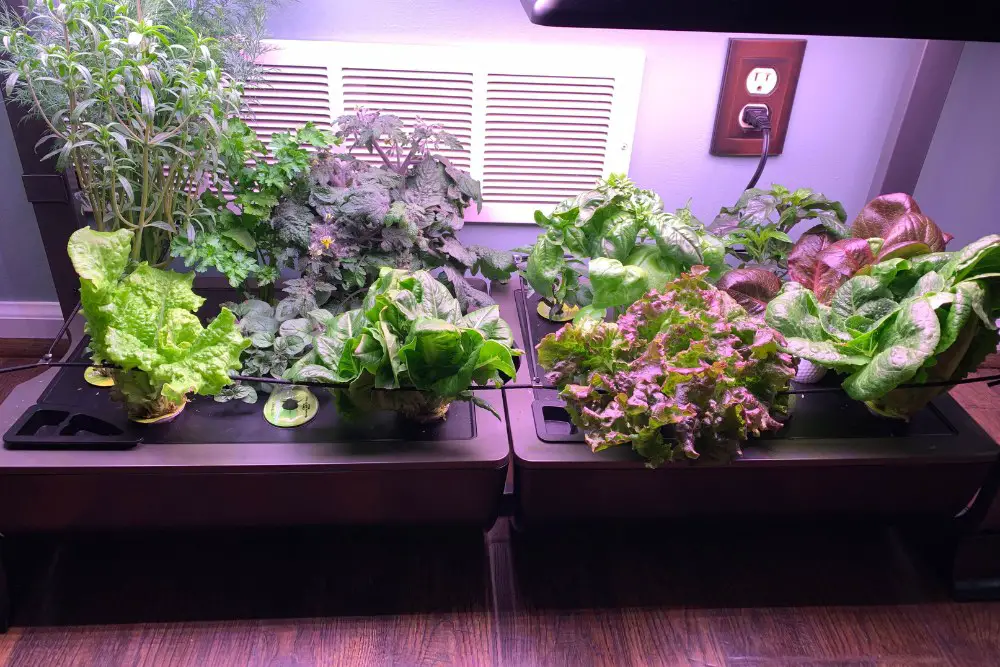
An Aerogarden is an indoor garden that grows plants using an aeroponic method. Using an aeroponic technique, no-soil gardening takes up lesser space and uses less water than traditional soil farming. Aerogardens are ideal for beginners and may be used to grow various plants such as herbs, tomatoes, lettuce, and many others! Many Aerogarden versions include built-in growth lights and irrigation systems, making gardening easier for the user.
The aero gardens include everything a plant needs, including a water tray, liquid plant food, grow LED lights, and full instructions on setting it up. These Aerogardens are available on Amazon, and you can select from various versions based on the size and area you have available. Mini versions of these indoor gardens are available if you want an Aerogarden but live in a small flat.
This article will cover how to Maintain and Sanitize Aerogarden, from the water tank to the pump and base. We’ll also go over how frequently you should clean your hydroponic system and what maintenance is vital to keep it running well.
How Does Aerogarden Work?
The AeroGarden operates by hanging the root ball of the plants over a reservoir of nutritional solution. This ensures that there is always sufficient water and nutrients to sustain plant development. The roots can dangle freely in this nutrient-rich fluid, ensuring they remain active and healthy without getting overly saturated or drowning from excessive water retention.
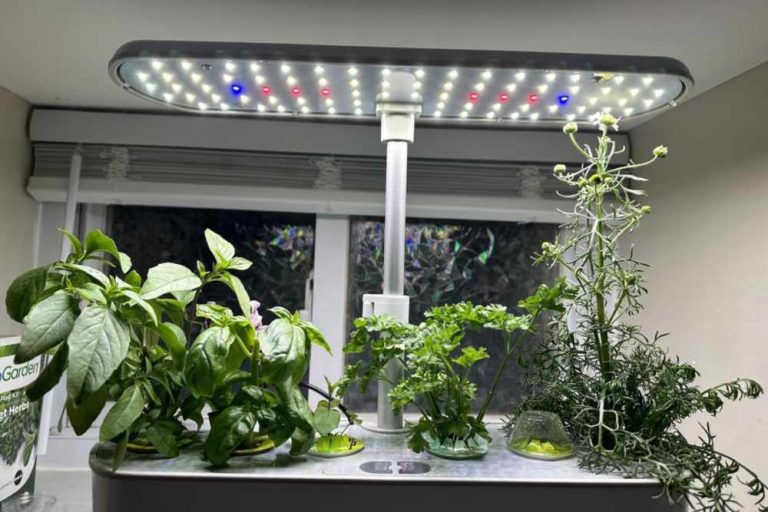
A broad-spectrum LED lighting system simulates sunlight and encourages photosynthesis in the root system. LED lights may be positioned considerably nearer to the roots without worrying about damage.
Aerogarden systems can be installed anywhere in the home, not only near a window for natural light. The smart app will enable you to adjust the light’s duration and brightness to meet your plant’s needs.
The nutrient solution is highly oxygenated, allowing for better absorption by the plant’s root system. These strategies provide for a bountiful Aerogarden harvest with little manual involvement. Furthermore, Aerogardens allows for a high level of customization in your garden.
Advantages Of An Aerogarden

Aerogarden Is a Simple, No-Fuss Way to Learn Hydroponics
Aero gardens are the most fundamental hydroponic systems for growing food or flowers in the house. With simple instructions, all the materials you need, and the food you need to get going, everything works straight out of the box.
There is timer-controlled lighting, a nutrient reservoir, net cups (grow baskets), and alerts for when to add more water and nutrients to your system. An Aerogarden is a practically error-proof system to start with, even though there are some simple DIY hydroponic projects you can try.
Aerogardens Allow You To Grow Food All Year
One of the most popular reasons for purchasing an Aerogarden is the ability to grow food year-round. Many gardeners buy Aerogardens to extend their growing season into the winter. You could use an Aerogarden all year round.
However, there is nothing that would prevent you from doing so. Although you still need to keep your Aerogarden system clean and maintained, you can use it all year round. Some individuals use Aerogardens as an all-year-round perennial herb garden in their kitchen because they feature lights, a reservoir, and an air pump built into one self-contained unit.
Aerogardens Are Very Space-Efficient
Most Aerogarden systems are small, allowing you to grow more plants in a smaller space. This makes them ideal for flats or other small spaces. Aerogardens are hydroponic systems so that you can fit more plants in a smaller area, and there is less competition for nutrients because every plant’s root is bathed in the same solution.
The only restriction is on how big the plants can develop, not on whether they can obtain enough nutrition. Most aero garden types are compact and lightweight, making them portable and complete self-contained systems that can be installed anywhere. Compared to most DIY hydroponic systems, even the larger Aerogarden Farm XL models have a lower footprint.
With Your Aerogarden Seed Kit, You Can Grow More
The Aerogarden is a versatile hydroponic system. You can grow a lot more types than what Aerogarden offers without using their seeds (which is one method customers of Aerogarden save money). You don’t have to buy Aerogarden seeds if you already have seeds. In your Aerogarden, you may produce any pepper, small cherry tomatoes, or even strawberries. The only limitation is the size of the plant you can grow, not the type. Most greens and shorter veggies grow well in the system.
Root vegetables may not have enough area to develop in the Aerogarden grow baskets, and taller, full-sized determinate tomato plants will require the huge Farm Aerogardens to thrive, but certain taller plants, such as kale and peppers, can be pruned on smaller versions before they contact the Aerogarden lights.
Plants Grow Faster In The Aerogarden
Plants grow far faster in hydroponic systems like the Aerogarden than they do in the soil. When properly nourished, plants grown under hydroponics often grow significantly quicker than soil-grown plants.
This is because the roots in a hydroponic system are immersed in a solution of plant-available nutrients. While some more straightforward systems (like the Kratky method) do not need aeration, adding aeration will further increase vegetative growth, providing lusher, healthier plants and lowering the likelihood that roots would drown from a lack of oxygen.
Deep water culture (DWC), which uses an air pump to maintain the nutrient solution aerated, is one system that uses aeration. The air pump’s bubbles sprinkle solution droplets onto plant roots, but as the plants mature, their roots will also grow down into the aerated nutrient reservoir. Another method is aeroponics, which involves spraying plant roots with a small mist of nutritional solution. The Aerogarden is a mix of a DWC and an aeroponic system.
Indoor Gardening Improves Mental Health
Growing plants indoors has various mental health advantages, such as reducing anxiety, stress, and seasonal depression. Growing plants inside has been demonstrated to have numerous benefits. It may be therapeutic to take care of indoor plants and see them flourish, especially if it’s done in combination with the satisfaction of growing your food.
However, the advantages can be considerably more useful to your health. Many individuals use gardening as a stress reliever. However, studies have discovered that people can reduce their mental and physiological stress after performing plant-care duties.
Horticultural therapy is another type of treatment in which therapists employ gardening activities to help patients cope with trauma, depression, and anxiety. If you already have an outside garden, utilizing your Aerogarden to grow herbs, veggies, or even flowers indoors allows you to continue gardening far into the long, dark winter months.
Disadvantages Of An Aerogarden

The Majority Of Aerogarden Models Is Expensive
The actual cost is substantially higher than DIY hydroponic systems of equivalent size for an Aerogarden hydroponic system. The most affordable type (Sprout) has enough space for three plants. It is suitable for small herbs, micro-dwarf tomatoes, flowers, or heavily trimmed chili peppers. If an Aerogarden cost is expensive for you, keep a look out for sales. In addition to promotions on third-party vendor sites, the Aerogarden website offers significant discounts on various models regularly.
AeroGarden Sprout

Bushier Plants May Overcrowd Your Aerogarden
Each Aerogarden system has various plant spaces, but certain types may require more room than others. Even if they are short enough for the Aerogarden, Bushier plants will need more space to flourish fully. The Sprout model has room for three plants.
Technically, to efficiently grow three plants in such a compact setup, however, you might need to use micro dwarf cherry tomato varieties if you’re growing dwarf varieties. Other larger (but still dwarf) cherry tomatoes can become somewhat bushy, so your Sprout Aerogarden system may only have room for one or two cherry tomato plants to avoid crowding. This is fine with the Aerogarden; This isn’t exclusive to the Aerogarden; it’s something to consider when cultivating multiple plants in a single hydroponic system.
Aerogardens Are Foolproof, But Not Maintenance-Free
It is recommended to clean your Aerogarden regularly, especially before planting new seeds or storing your Aerogarden. Cleaning is necessary to remove hazardous bacteria, mold, and mineral deposits accumulated during each growth cycle. Although it does not use microbe-rich soil, hydroponics is not entirely sterile.
Bacteria, mold, and algae can grow in the Aerogarden sponges and nutrient reservoirs. While modest amounts of bacteria or mold may not harm mature plants, too much can destroy seedlings (such as damping off).
Furthermore, minerals and nutritional salts in your water can deposit and collect inside your Aerogarden system. You can even have your pumps clogged by severe mineral accumulation.
You can read more details about Aerogarden at the Aerogarden herb tips post.
Why should Aerogarden be cleaned?
It’ll help if you learn how to clean an Aerogarden. It’s critical to clean your Aerogarden regularly to remove any soil, debris, mineral deposits, or hazardous germs that can form over time. These accumulations can clog the Aerogarden’s pump and other components if they aren’t removed, stopping it from functioning correctly.
Uncleaned grow trays can result in a nutrient imbalance, so routine cleaning ensures that your plants receive the necessary nutrients. Harmful bacteria could harm your hydroponic garden without properly cleaning the system and prevent you from growing fresh herbs.
How Often Should An Aerogarden Be Cleaned?
Cleaning your Aerogarden once every two weeks is usually suggested. The cleaning process is complex, but you should still wash your system. You should clean it more frequently if you see any accumulation of dirt, debris, or mineral deposits. During a mid-grow clean, be careful not to use strong chemical cleaners or soap, as these could hurt your plants.
What You’ll Need for Aerogarden Cleaning?
- Bleach Or White Vinegar – To effectively clean your AeroGarden, use bleach and/or vinegar. Vinegar is a natural cleaner that kills bacteria without the use of harsh chemicals. Vinegar will work perfectly to keep your AeroGarden clean if you’d prefer to avoid using harsher chemicals like bleach. Although the smell of vinegar isn’t pleasant, it fades almost completely after drying.
- A Large Bowl – A big plastic basin is required to immerse the plastic pieces of your AeroGarden in a vinegar or bleach solution. The ability to soak all the components ensures that the vinegar cleans every nook and cranny of the parts.
- Soft Towels – Soft towels are required to clean some parts of your AeroGarden that cannot be immersed in the bleach or vinegar solution—simply wipe out some of the AeroGarden’s non-waterproof components, such as the light cowl and touch screen/meter. Doing this ensures that your AeroGarden has been thoroughly cleaned and is free of any germs or pathogens growing inside the garden or on its borders.
- Paper Towels – Paper towels are great for getting into those hard-to-reach regions around seed pods or underneath the grow deck. When cleaning around exposed roots, use caution because roots are delicate and easily ripped or pulled out.
how to clean Aerogarden In 7 Steps

Make sure the AeroGarden is unplugged and not currently using any electricity. If water is nearby, do not plug anything into an electrical socket.
Step 1 – Disassemble The AeroGarden
Disassemble the AeroGarden and all of its parts and pieces before cleaning them. Remove the light hood and disconnect it. Separate the AeroGarden base and bowel so that they may be cleaned separately.
Remove any remaining components and parts from the AeroGarden. If you worry that you might forget how to reassemble parts, a bit of helpful advice is to take images of the locations of the various components.
Step 2 – Set Up The Vinegar Or Bleach Bath
AeroGarden components will immerse and absorb moisture here. Except for the AeroGarden bowl and light hood, most parts and accessories will fit inside the bowl.
A gallon of warm water and a cup of white bleach or vinegar should be added to the large bowl and stirred together. Give the AeroGarden components 20 to 30 minutes to soak in the bowl. Meanwhile, begin disinfecting and cleaning the AeroGarden bowl.
Step 3 – Sanitize The AeroGarden Bowl
The enormous AeroGarden bowl contains water that flows through it to produce this popular hydroponic garden. Because it’s enormous, you won’t be able to immerse the entire AeroGarden bowl in the vinegar bath like the smaller pieces.
Because water is moving through the unit, bacteria or mold may begin to form inside the base of an AeroGarden if there is too much moisture present. To remove the bacteria and mold that may have grown, use some vinegar solution to circulate through the unit similarly. Before beginning, remove all of the water from the dish.
Turn on the AeroGarden after adding the vinegar or bleach solution and allow it to circulate. Run it for around 5 minutes to allow the solution to clean and disinfect the AeroGarden.
After pouring the solution into the sink, leave the bowl submerged in fresh running water for a while to allow the majority of the liquid to drain away. Once finished, drain the rinse water and replace it with fresh water for the next growing batch of plants.
Step 4 – Clean the Remaining Surfaces Of The AeroGarden
After soaking and sanitizing parts of the AeroGarden, it’s essential to wipe down any places that weren’t soaked or rinsed. Use a clean cloth soaked with warm water and vinegar solution to clean the other surfaces.
It would help if you were cautious when wiping clean the LED lights because they are made of glass, and you don’t want them to break. Additionally, a dry towel is not required to be used to clean the surfaces. Air drying is quite acceptable and will not take long.
Step 5 – Take the AeroGarden Parts Out Of The Vinegar Or Bleach Bat
After sitting in the solution for 20 to 30 minutes, the parts should be completely rinsed with water. To stop small parts from falling down the drain, you should put something at the sink drain. Although most parts won’t end up in the sewage, exercising caution is always a good idea. On a towel or paper towel, the pieces can be allowed to air dry. It is not necessary to wipe them down to dry.
Step 6 – Reassemble The AeroGarden
Reassembling the AeroGarden and starting to cultivate the following plants is necessary after all the AeroGarden components have completely dried. See the instruction manual if you can recall how to put the parts back together. Use the photos you took as well if you did.
Step 7 – Grow Your Next Plant
It’s time to cultivate your next plant now that everything has been cleaned and sanitized. Start by adding nutrient-rich water to the reservoir. By doing this, the plants will still have access to nutrients. After that, sow the seed pods in the grow deck spaces and relish the excitement of watching your new plants grow!
Frequently Asked Question
How To Clean AeroGarden With Plants?
Even though AeroGardens are often cleaned before planting, sometimes you may want to clean the AeroGarden while it still has planted inside of it. This may occur if the system contains tainted water that encourages the development of mold or algae.
The simplest way to clean the AeroGarden while planting is growing is to remove the plants from the system, clean the system, and then restore the plants. Start by elevating the light arm as high as possible to get the lamp out of the way.
Clean, fresh water should be added to a sink or basin. If feasible, remove the whole top deck with the plants remaining in their places. Prop the deck up in the basin with chopsticks, so the roots are submerged, but the grow deck retains the pods at the top. After finishing your cleaning, rinse the reservoir and re-pot your plants in new, clean water.
Do I need to use bleach or vinegar to clean my AeroGarden?
Definitely not. To get rid of any bacteria and organic matter buildup, Aerogarden suggests utilizing one or the other. However, some people have had success cleaning their Aerogardens with nothing more than water. So, if you are sensitive to chemicals, you can also try them. Be sure to complete the cleaning if you are missing one of these items. Using water and a clean sponge or towel for one or two growing cycles should be fine.
Can Aerogarden be washed in the dishwasher?
The bowl can be washed; however, the Aerogarden machine cannot be put in the dishwasher.
How can I get algae out of my AeroGarden?
Use a paper towel and a diluted vinegar and water solution to wipe the algae off your AeroGarden to get rid of it. Dilute the vinegar with 1 part vinegar to 10 parts water. Keep the container out of direct sunlight and cover empty seed pod holes on the grow deck to help avoid algae growth.
What is causing the mold in my AeroGarden?
Due to the ongoing water flow, your AeroGarden may develop mold, fungus, or bacteria. They are easily removed with a moist cloth or paper towel. The fungus can also be useful at times. But removing the mold is usually preferable after you’ve finished cultivating one of the plants.

Lilani graduated with a bachelor of agriculture, with a specialization in biotechnology from the Wayamba University of Sri Lanka, as well as she is following a Master’s in Molecular Life Sciences. She has a passion for writing and communicating about agriculture topics and loves enthusing people about the botanical world.
- 15 Ingenious Kitchen Garden Ideas to Cultivate Freshness Right at Home - April 7, 2024
- 10 Top Picks Best Plants for Open Terrarium - April 2, 2024
- 21 Easy and Cheap Walkway Ideas for a Charming Garden - March 31, 2024